
- Part 1 - Download and Setup Invoice 360 Client to connect to the Cloud
- Part 2 - Testing and Running the Invoice 360 Client App
Requirements
- Windows 10 (on a Desktop Device)
- Internet Connection
Part 1 – Download and Setup Invoice 360 Client to connect to the Cloud
1. On your Windows 10 device, click on “Ask me anything” and search for “Developer Features”. Click on the “Use developer features” settings. You will see the following app.
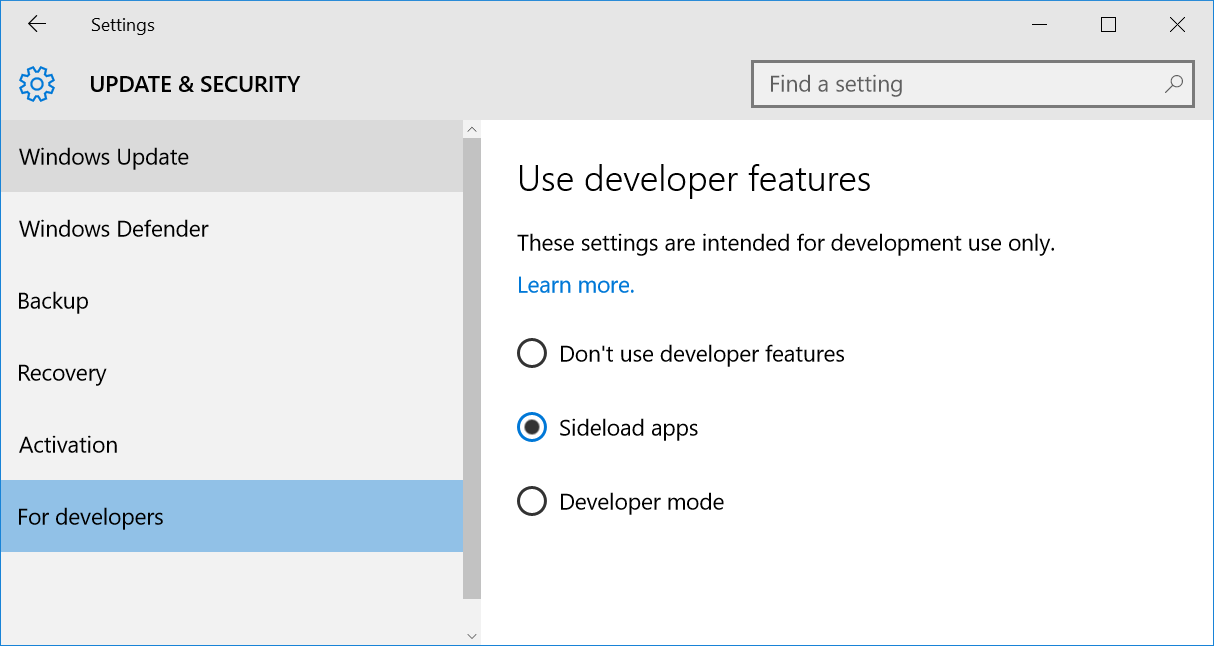
2. Select the “For developers” section and in “Use developer features”, select “Sideload apps”. Basically, the initial versions will use Windows 10 sideloading for installing the Invoice 360 Client app.
3. Download the Invoice 360 Client binary. The source will be available soon as described on this webpage.
4. Unzip the folder and then Right click and Run the following file with PowerShell:
Add-AppDevPackage.ps1
Select Yes when you are prompted to install the certificates and also when you are prompted to change the Execution policy. Wait until you see “You app was successfully installed” as shown below. This means the Invoice 360 Client app has sideloaded successfully.

5. Launch the Invoice 360 app from the Windows Start menu. The icon of the app is as shown below.
6. Since this is the first time you are running the app, you will be prompted to Setup the app.
7. Download any of the client settings file from the following:
- invoice365-demo1-bootstrap.cloudsettings
- invoice365-demo2-bootstrap.cloudsettings
- invoice365-demo3-bootstrap.cloudsettings
We have a subsequent tutorial that illustrates how to setup a self-host server in Azure. You can then change your .cloudsettings file to connect to your cloud server.
For now, simply click on the Setup button on Invoice 360 and then select any of the above .cloudsettings file.
If you look inside the invoice365-demo1.cloudsettings file, it looks like the following:
<invoice365Data xmlns:xsd=https://www.w3.org/2001/XMLSchema xmlns:xsi="https://www.w3.org/2001/XMLSchema-instance"> <invoice365 appUrl="https://invoice365-demo1.azurewebsites.net/" appID="wAhUHouIuZVUyXRJraeHhxqbgLbohI2x" clientID=" " authority=" " resourceURI="" action=”bootstrap”/> </invoice365Data> |
- appURL – specifies the location of where your cloud server is hosted. This will be the parameter that you will need to change if you have setup a self-host server.
- appID – specifies the ID used to gain access to Invoice 360 Cloud App Service. Please note that this is not the only authorization mechanism we will be using. We will show you how to use Azure Active Directory to protect your application in the future.
- clientID, authority and resourceURI will be used to setup the Azure Active Directory authentication for the client app. This will be explained in the future.
- action – specifies the action to carry out. For now, the following are supported:
- init – initialize the server with an empty database and use this database for the app.
- bootstrap – download data from the cloud server to initialize and bootstrap the app.
- restoreDB – restore the cloud from a previously backup local database.
Part 2 – Testing and Running the Invoice 360 Client App
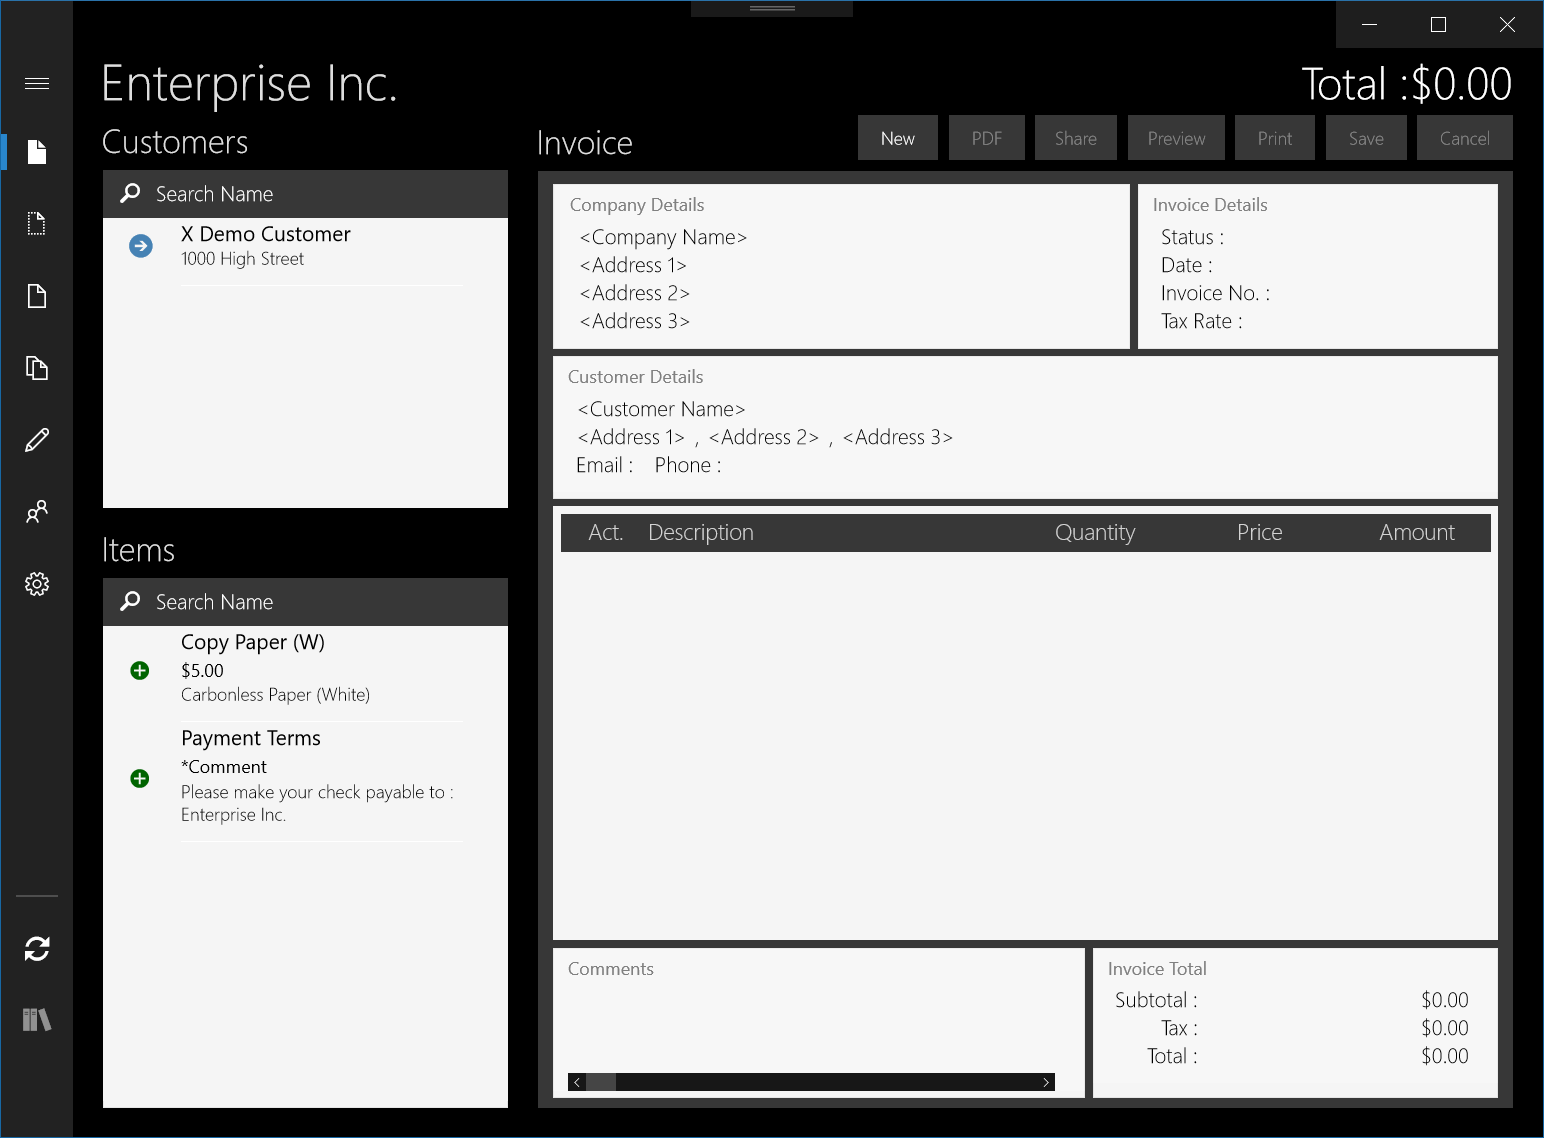
1. Part 1 of this tutorial shows you how to bootstrap the Invoice 360 client app with the data stored in the cloud. Once the bootstrap completes, you should see the following screen:
2. The Invoice 360 Cloud Sync Client app is very similar to the one in the Windows Store today. The user interface has evolved through many iterations with many changes made based on recommendations by users who use it daily. The application consists of the following screens which you can access through the Ellipsis button (or Right Click with your mouse) on the bottom right hand corner of the app. Each of the different screens allows you to manage a different aspect of the invoice process.
- Invoice
- Quote (needs to be turn on in Settings)
- Estimate (needs to be turn on in Settings)
- History
- Customer
- Inventory
- Settings
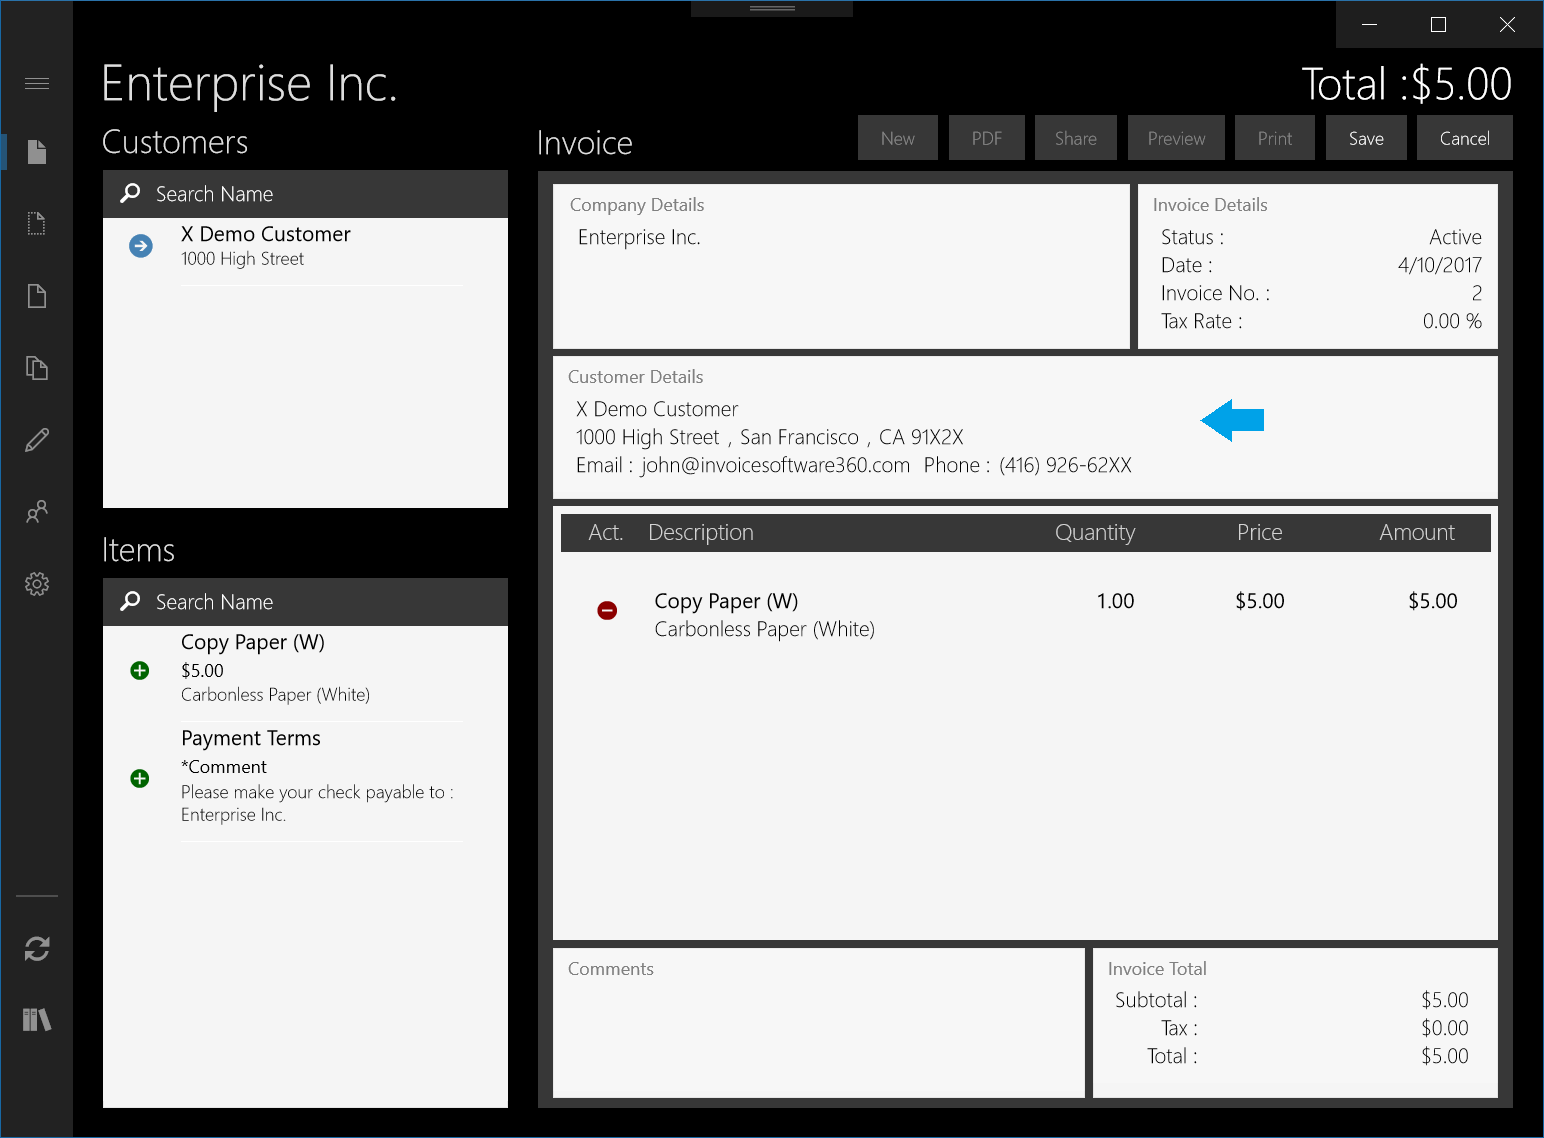
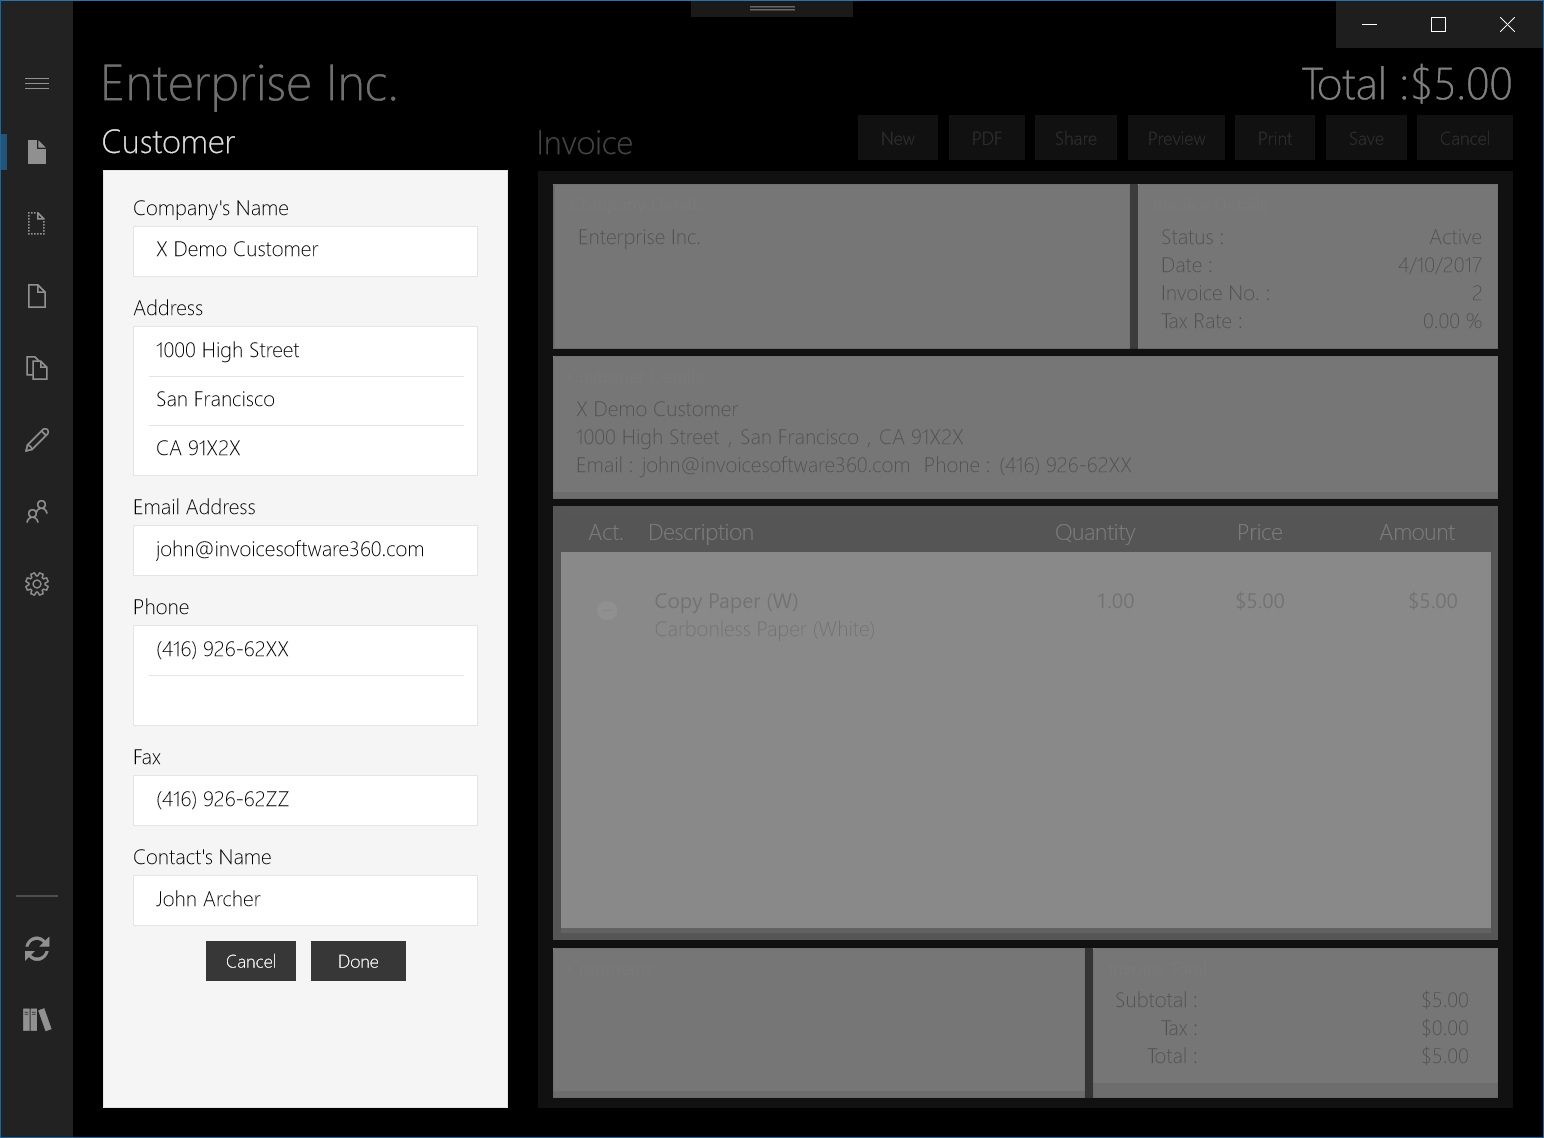
You can further customize the details of your invoice by clicking on any part of the invoice on the app. For example, clicking on the area specified by the blue arrow above allows you to make changes to the details of the customer. This is as shown below:
4. You can also go to the other screens such as Customers or Inventory to add new customers and items. Please note that each time you make a change to the invoice or ay records, it will be saved to your local database. The changes will also be automatically pushed up to your Invoice 360 cloud. If a network connection is not available, the push operations will be cached locally until a connection is available. You can also click on the “Sync” button (Right Click with your mouse or click on the Ellipsis button), this pushes your data to the cloud and at the same time pulls data from the cloud onto your local database.
5. You can also setup different devices to connect to the same cloud and test out syncing conflicts.
6. More information on using the Invoice 360 app is also available at the following:
https://invoicesoftware360.com/invoicesoftware.html