
Before you create an invoice, you need to setup some basic information such as Company information, Customers list, and Inventory Items. This setup is typically carried out once, and you can reuse the information in your invoices thereafter.
The following sub-sections will guide you through the setting up of basic information.
Settings - Company Information
The app allows you to create up to five companies, a capability provided after feedback from many of our users. Each company can be used
to store a different set of information such as name, address and phone numbers. When you invoice a customer, the information from the "Active" company will
applied to the invoice. You can set a company as Active by selecting it and then clicking on the <Set as Active> button.
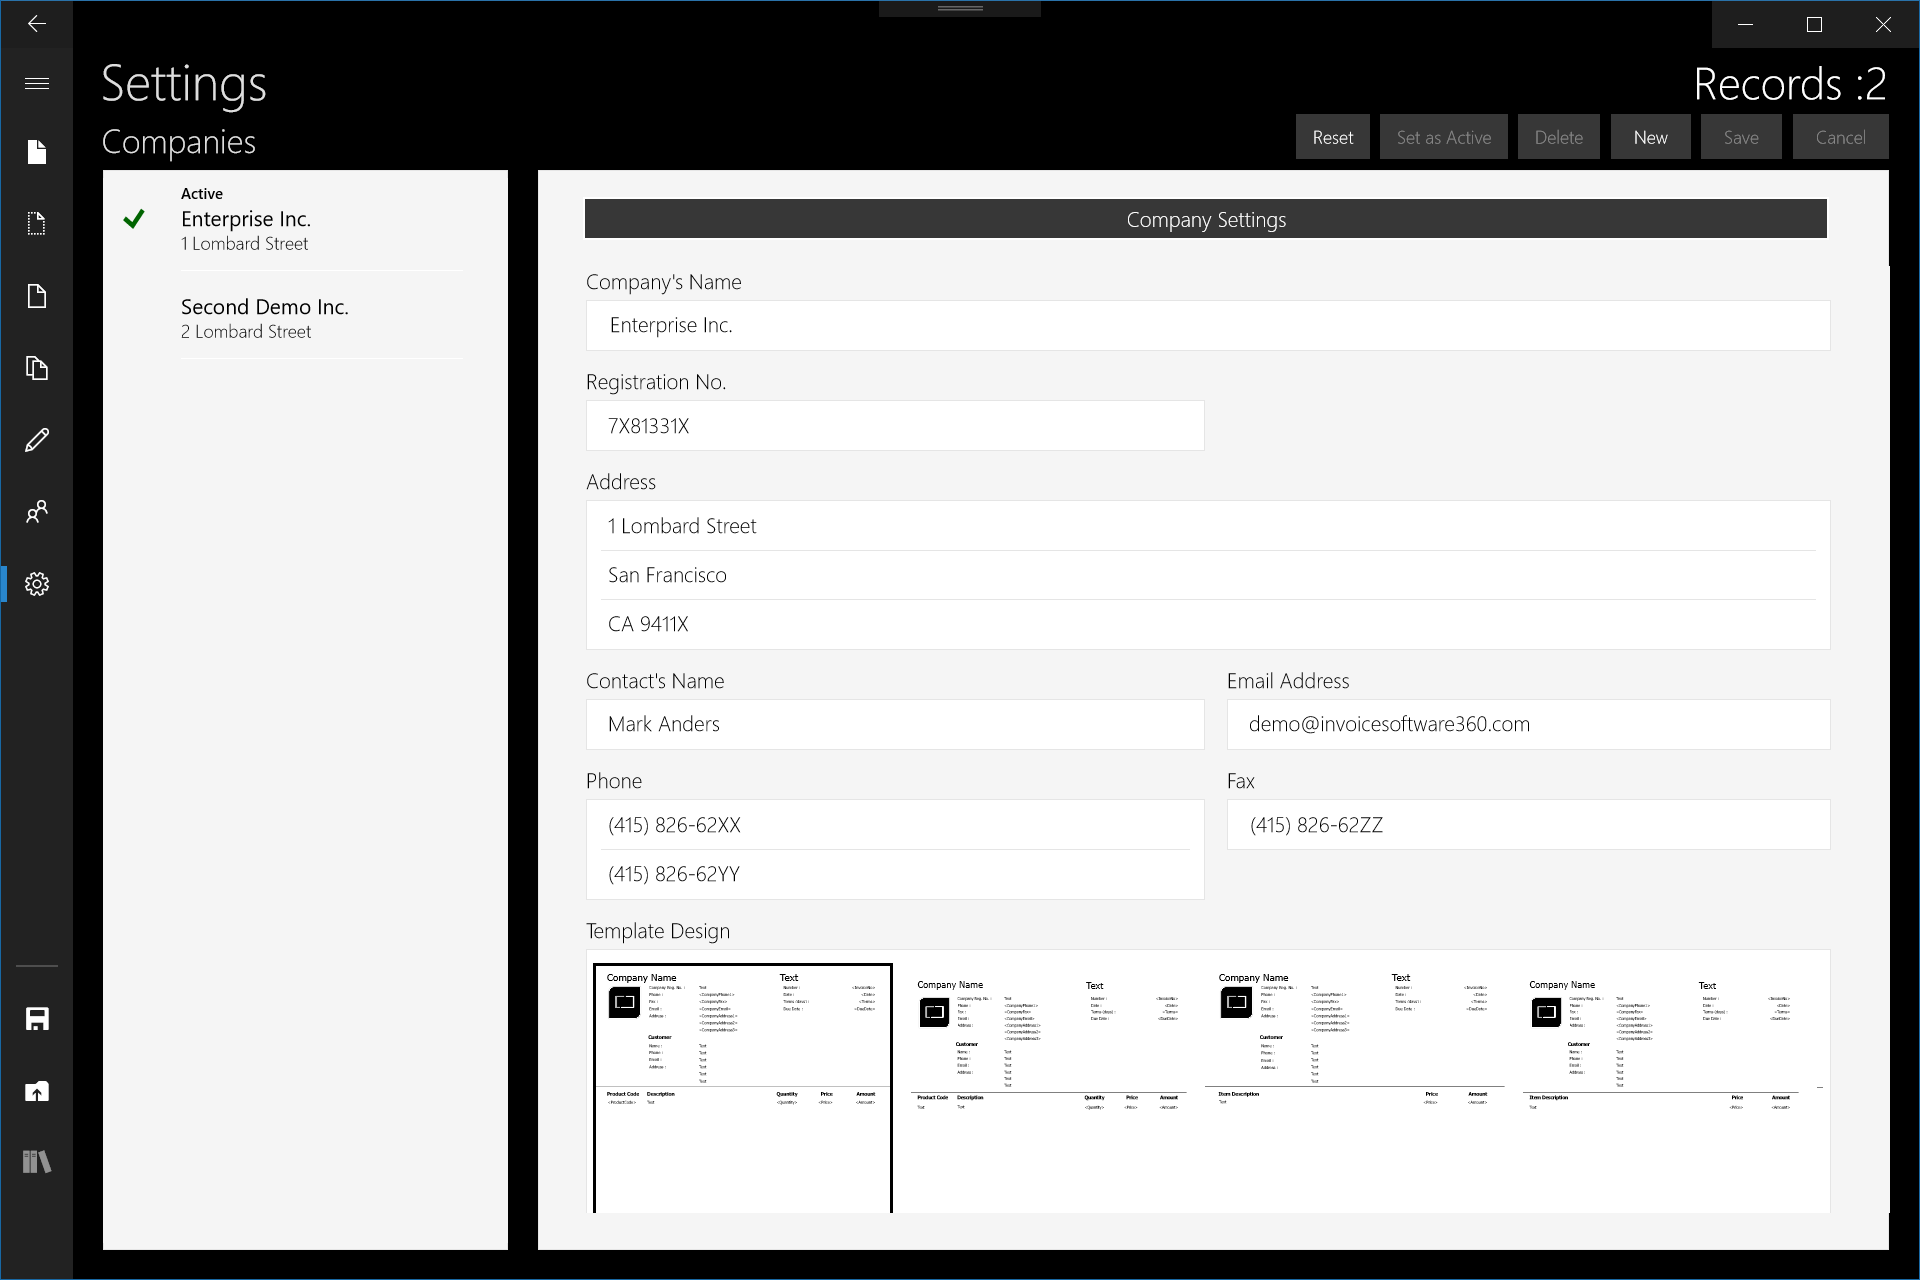
- Current Invoice Number
This field is used by the app to keep track of the current (or last) invoice number used. When you create a new invoice, the app will automatically assign a new invoice number by incrementing the value of this field. You can change the value of this field if you want to start with a invoice number different from the default (zero).
Note: Please note that once an invoice is created, this value can no longer be changed. - Template Design
This option allows you to select the template to create a new invoice. Several invoice templates for Letter and A4 sized paper are provided in the app. If you need to further customize the invoice template to include additional information, you can use the free Invoice 360 Template Designer on your Desktop to design the template.
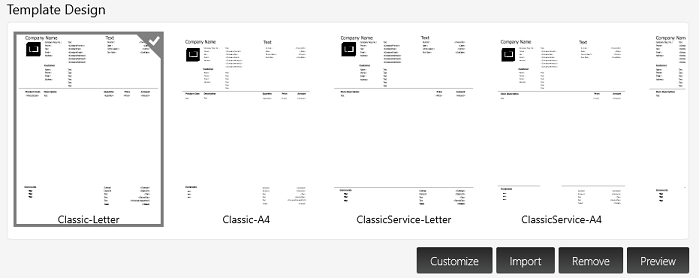
Import - Import a customized invoice template generated by the Invoice 360 Template Designer (Desktop).
Remove - Remove the selected template.
Preview - Preview the selected template. The logo will be displayed as part of the invoice.
- Logo
The Logo of the invoice. After selecting a Logo, save the settings and you will be able to preview the Invoice Template with the Logo. The app provides capabilities to change the image of the Logo. To change the size of the Logo, you will need to use the Invoice 360 Template Designer. - Tax 1
Tax 1 is the first tax to be applied on the sub-total of your invoice. This is typically the standard sales tax. - Tax 1 Abbreviation
The abbreviation of Tax 1. For example, "VAT", "GST" or "Service Tax". The location of this tax abbreviation on the invoice can be customized with the Invoice Template Designer. - Tax Type Inclusive
Tax 1 can be set up to be inclusive or exclusive. If it is set to inclusive, the total amount is inclusive of the tax.
For example,
Subtotal $10.00 Tax at 10% (Exclusive) $1.00 Total $11.00
Subtotal $10.00 Tax at 10% (Inclusive) $1.00 Total $10.00
- Tax2
This is the second tax to be applied on the invoice. For example, in some countries, a restaurant charges a "Service Tax" on the sub-total and Tax1. - Tax 2 Abbreviation
The abbreviation of Tax 2. For example, "VAT", "GST" or "Service Tax". The location of this tax abbreviation on the invoice can be customized with the Invoice 360 Template Designer. - Accumulate Tax 2
This option determines whether the second tax is calculated based on the sub-total of the invoice or the sub-total plus Tax 1. If Accumulate Tax 2 is set to Off (default), second tax is calculated only on the sub-total of the invoice.
For example,
Subtotal $10.00 Tax1 at 10% $1.00 Tax2 at 10% $1.00 Total $12.00
Subtotal $10.00 Tax1 at 10% $1.00 Tax2 at 10% (Accumulate) $1.10 Total $12.10
- Shipping Charge After Tax
The Inventory screen provides capabilities to setup Charge items before tax. In some countries, a shipping charge after tax is required. If this is the case, this option can be turned on. - Shipping Charge Desc.
The Shipping Charge After Tax Description. This is the abbreviation of the Shipping Charge After Tax. The location of this abbreviation can be customized with the Invoice 360 Template Designer. - Terms (in days)
This field is used for calculating the Due Date of an invoice. If this field is set to 30, an invoice created today will be due 30 days later. The Invoice History screen provides capabilities to search for invoices that are already due. The criteria is based on this option. - Invoice Discount (%)
Invoice Discount is the discount in percentage applied on the entire invoice before tax. This discount is at invoice level. - Customer List Sorting
You can sort the customer list, displayed in the Invoice screen, in ascending or descending order. - Inventory List Sorting
You can sort the inventory items, displayed in the Invoice screen, in ascending or descending order. - Invoice History Sorting
You can sort the invoices, displayed in the Invoice History screen, in ascending or descending order. - Country
Different countries have different requirements and formats for the Date and Money fields. For example, some countries such as France uses " " as the thousand separator while some countries such as United States uses "," as the thousand separator. If this option is set to "Default, Invoice 360 will use the country settings specified in Windows. Simply set this option to another country if invoicing using other country settings are required. - Sound
If this option is set to "On", a beep sound will occur when an item or customer is added to an invoice in the Invoice screen.
It is important to note that once a Company has invoices, the company cannot be deleted. To delete the company, void and delete the invoices under this company.
Customer Information
You can setup customer information in this screen.
- Customer Name
Customer Name is a unique identifier for your customer record, hence you cannot create two customers of the same name. - Address
The Address field contains three different lines known as Address1, Address2 and Address3. If you import a contact from Microsoft People's app, the address of the contact will be formatted into three different lines. - Email Address
The Email Address of the customer. - Phone
Two different phone numbers of the customer can be setup in this field. - Fax
The fax number of the customer.
Tap the <Save> button to effect your changes.
It is important to note that once an invoice is issued to the Customer, this Customer cannot be deleted. To delete this Customer, you have to void and delete the invoices issued to this Customer.
Inventory Item Information
You can setup inventory items here. The <Duplicate> function provides a convenient way to duplicate all the information of a record.
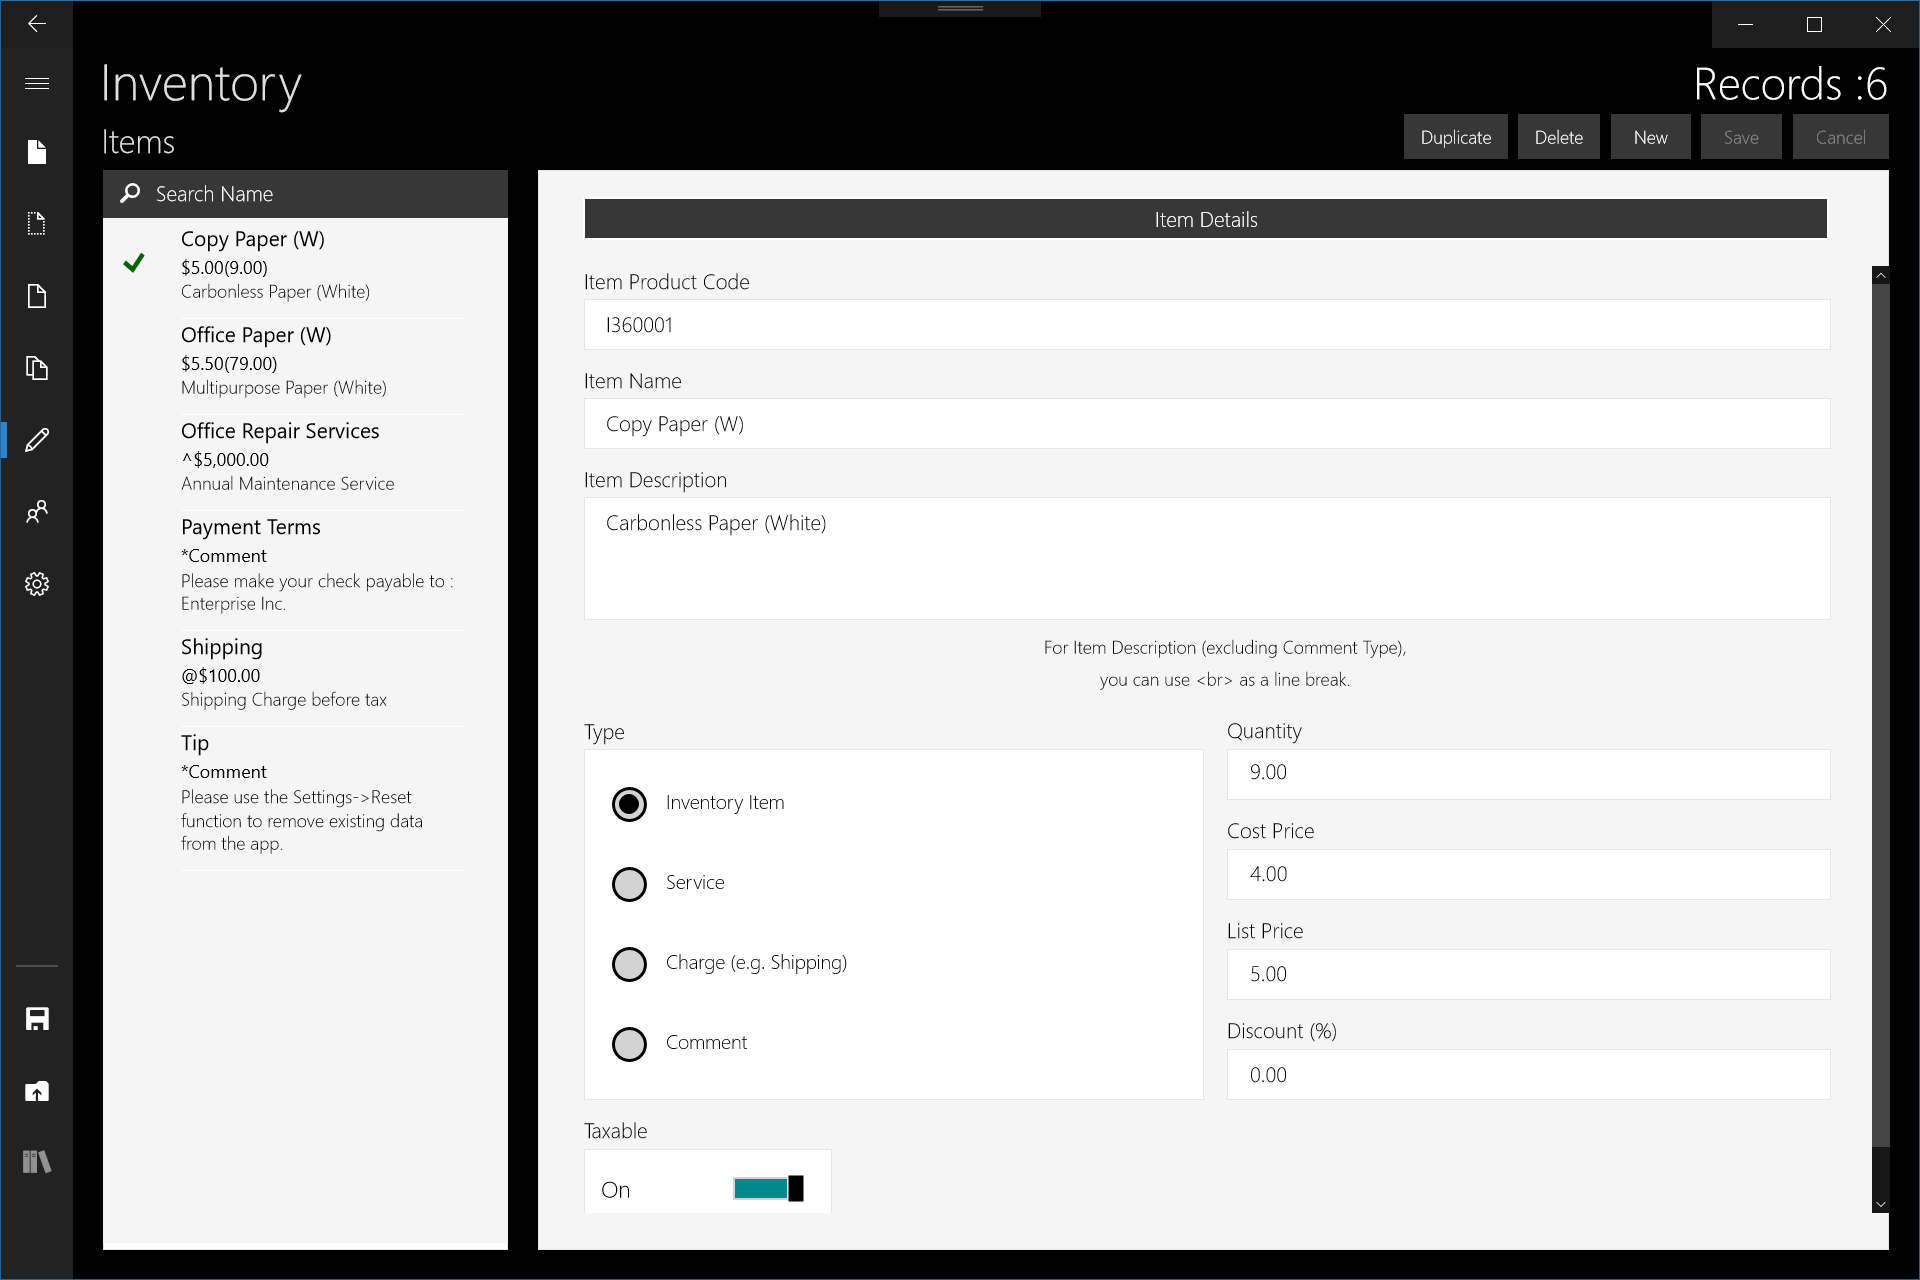
- Item Product Code
The Item Product Code is a unique key to identify an inventory item. The Item Product Code is defaulted to 'I0000'; the next Item Product Code would be 'I0001' and so on. You can change the Item Product Code as long as you have not used this item in any invoice. Otherwise, this field is non-editable. - Item Type
For Item types pertaining to Inventory Item, Service and Charge, the item would be added in the invoice, impacting the invoice total amount. The Comment Item Type is an added flexibility for you to include a statement on the invoice or as a reminder to the invoicee e.g. "Please make check payable to :". The Comment Item Type does not impact the invoice total amount. The Charge Item Type is used for adding items such as shipping charge before tax to an invoice. To add a charge after tax, refer to the Settings screen. The Service Item Type is used for creating items that has a fix quantity of one (1). - Discount (%)
Each of the item can be discounted using this percent field. A change in the percentage of this field does not affect existing/previous invoices. It only affects new invoices. - The Items List on the left-hand side of the screen shows Item Name, Price, (Number of Items in the Inventory) and Item Description. You can search for an Item and select an Item to edit the information on the right-hand side of the screen.
It is important to note that once an invoice is issued using an inventory or service item, the item cannot be deleted. To delete this item, you have to void and delete the invoices issued with this item.